
Gable Grip – Technique Explained
When going over almost any technique in Jiu Jitsu class, there is one particular grip you always hear. The Gable grip.
It is one of the if not the strongest grip in all of grappling and is used in numerous techniques. Although you seem to always hear the Gable grip used as a detail, but really never told its mechanics.
Well now you’re going to find out almost everything about the Gable grip. We’re going to detail behind grapplings best grip, the mechanics of it, and numerous techniques that include the Gable grip.
Who came up with the Gable grip?
The Gable grip is named after legendary amateur wrestler Dan Gable. He is one of the greatest amateur wrestlers that has ever lived. Probably his most notable accomplishment was winning the 1972 Olympics winning 6 matches without getting a point scored on him.
Gable was a master of freestyle wrestling and was known for his amazing gripping ability. Once he locked his hands around you it was just about over.
His ability to grip his opponents was so respected that his palm on palm grip was renamed to “the Gable grip.” Today every practitioner of wrestling to Jiu Jitsu are taught the Gable grip within their respective arts.
How does the Gable grip work?
The function of the Gable grip is pretty straightforward. It’s a five finger palm on palm grip, where you lock your hands on top of one another.
You keep your elbows in and once you’ve properly locked in this grip it is extremely hard to. It is so effective that the techniques that include using a Gable grip are nearly endless.
Everything from breaking your opponent’s posture, head control, and even the grip to finish submissions.
The Gable grip
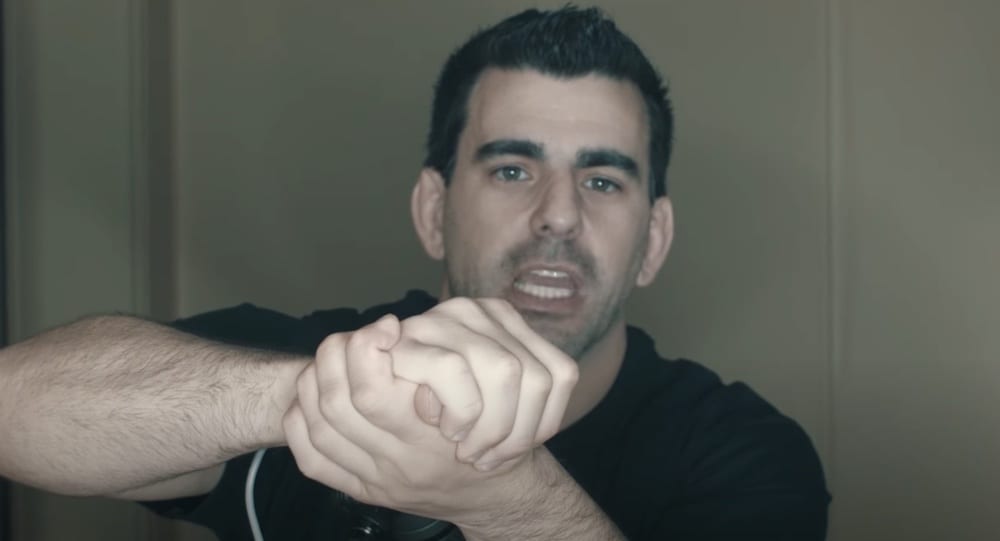
Before we get into the techniques, you need to first know how to properly lock on your Gable grip.
Your first detail is to connect your thumbs to your other fingers. When all of your fingers and thumbs are connected it makes your grip stronger.
The next detail is the Gable grip is always a 5 finger palm on palm grip. One hand comes on top of your other hand to lock on your grip.
Then the last details you need to remember are to bring your elbows in and squeeze with your body. Your elbows are closed to eliminate free space and you always squeeze with your body to exert the maximum pressure.
Anaconda Choke
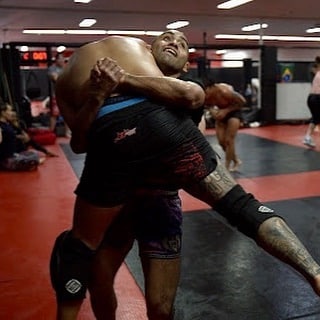
The Gable Grip was ideally created to control an opponent in a front headlock position. This is why the grip is one of the primary details in front headlock chokes.
With an anaconda choke, the Gable grip is the grip you use to hold your opponent in place. Before you transfer to your choke, go palm on palm with your Gable grip and bring your opponent’s elbow in.
Once you’ve brought your opponent’s elbow in, transfer to an arm on bicep grip and go to finish your choke.
Darce Choke
Another front headlock choke that has the Gable grip as one of its primary details is the darce choke. Normally with a darce choke, you can’t slide right into your darce choke grip.
You usually have to control your opponent’s head and adjust your position before you lock on this grip. The common grip to use before you transition is the Gable grip.
With the darce, the Gable allows you to control your opponent and keep them in place. After you get your arm under your opponent’s head, lock your grip on top of your opponent’s neck.
Once you’ve established control, transition to your choke grip for the finish.
Arm Triangle
The best grip to use for finishing an arm triangle is the Gable grip. Once you lock in this grip, the choke should be just about finished.
For a basic arm triangle from on top, you can either start the process from side control or the mount. Get one hand behind your opponent’s neck and push their arm across the front of their neck.
Next put your next to your opponent’s head with your ear next to their ear. Then reach your hand through to lock on your grip and bring your elbows in.
Once you’ve set your grip, drop your weight down and squeeze with your entire body.
Peruvian Necktie
A Gable grip is a finishing grip that is great to use to finish a Peruvian necktie. The reason for this is because in front headlock control, it is hard to get a tight grip around your opponent’s neck. When you have a Gable grip the choke tightens up once you step up and fall back.
Start the Peruvian by snapping your opponent’s head down and control them with thisgrip. Keep your elbows tight and your legs away from your opponent to make it less likely for them to counter.
With your grip secure, walk your leg up to your opponent’s head. Place your thigh on top of your opponent’s head and extend your leg out.
To finish the choke, come to the center line and fall on your right hip. As you fall on your hip, your leg pushes your choke arm into your opponent’s neck.
Japanese Necktie
You can set up a Japanese necktie off the same entrance to the darce choke entry from side control. Start by driving your arm under your opponent’s neck and bringing your arm behind their head.
Once your hand comes through, lock your hands together into a Gable grip. Now instead of the normal darce choke setup, you switch to a Japanese necktie set up.
Keeping your grip, step over your opponent’s top leg and pull it towards you. Then fall to the shoulder of your choke arm, cross your legs, and extend your back to finish the choke.
Hadaka Jime
The Hadaka Jime is what they call the RNC in Judo. One of the variations of the Hadaka Jime is a short air choke, where you use a Gable Grip.
Your arm goes around your opponent’s neck just enough to where your forearm is in front of their neck. To put on your Gable grip, take your other hand palm up and lock your hands together.
For the finish, put your head next to your opponent’s head and lock on the squeeze. This is more of an air choke than a blood choke, but if you practice Judo it’s a must know technique.
Reverse Arm Lock
The last submission we will detail that includes a Gable grip is a reverse arm lock. When you go to finish a reverse arm lock, you can use a Gable grip to hold their arm as you go for the finish.
From your guard, underhook your opponent’s arm, and bring your head to their wrist. Then lock on your grip above your opponent’s elbow.
Then to get in position to finish, do a hip escape and put your foot on their hip. To finish the reverse armbar, you can finish with different grips.
You could either keep the Gable grip, rotate your forearm on top of your opponent’s elbow and push down. Or put two hands on your opponent’s elbow and push down to get the tap.
Front headlock go behind
One of the most common uses of the Gable grip in a front headlock before doing a go behind. The go behind is the transitional move you do when you rotate to take your opponent’s back.
Start by snapping your opponent down and then control their head using a Gable grip in the front headlock position. Once you’ve established control, you can then go into the final movement towards their back.
Push their elbow in, let go of your grip, reach towards their far hip, and rotate your body around their back. Remember when doing a go behind that you need to stay glued to your opponent’s back.
Tips for using the gable grip
The Gable grip is very easy to use, but the details have to be precise. Here are some tips to remember when using it.
- Thumbs In: Connect your thumbs to your hands to properly lock on a Gable grip.
- Palm on Palm: The Gable grip is always palm on palm with one hand on top of the other.
- Elbows In: Once you lock your hands together bring in your elbows to close space and make the grip tighter.
- Squeeze With Your Body: Always use your entire body with your Gable grip to give the tightest pressure possible.